Millboard Decking options
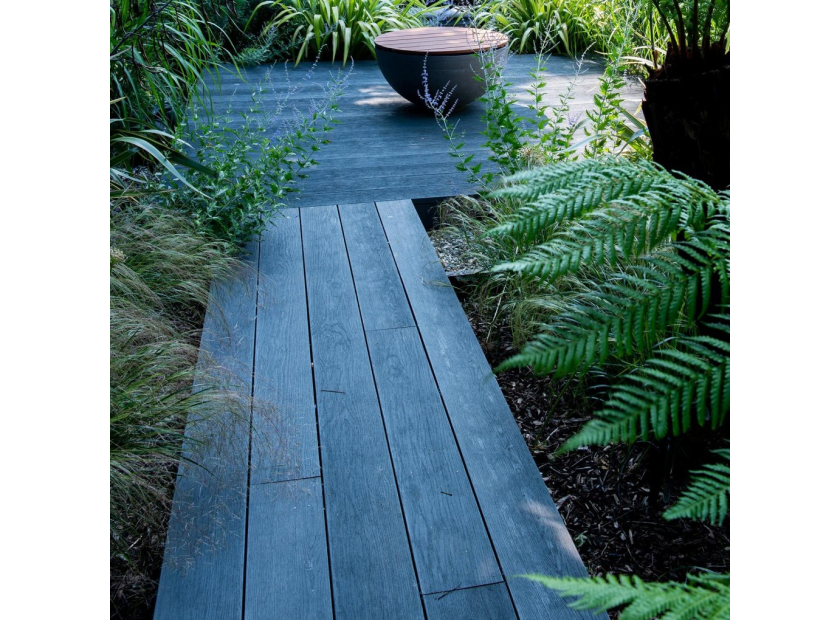
Millboard deckboards have always looked in a different league when it comes to aesthetics, but there again they are a top of the range product. With a little extra care on installation they can look even more
Some notes on getting the look with Millboard decking
Because Millboard deck boards are designed to replicate natural products they are manufactured with secondary toning colours. This means there will inevitably be some variance in colour tone within each board and therefore from board to board, this is perfectly normal. The consistency of colour may also vary slightly from batch to batch. It therefore makes sense to order all boards required in the one delivery. If this is not possible then try mixing the batches to blend the colours as much as possible. As with all things constantly exposed to ultra violet light and all weathers, colours will tone slightly in time, this is normal for decking. Upon receipt of your delivery if colour appears unacceptable or you believe them to be defective in any way, do not install the boards and instead contact ourselves at Southern Timber.
Securing the deckboards
Firstly ensure you use the Millboard Durafix stainless fixings. Not using these screws, or failure to follow Millboard’s guidelines could invalidate the Millboard 25 year warranty. When securing your Millboard decking with Millboard Durafix stainless steel fixings there is no need to pre-drill or countersink, just screw straight in. Push down, start the driver slowly and speed up; then slow down when driving the head of the screw through the Lastane®. The screw should be stopped about 5mm below the board surface, no deeper. This should leave a small, virtually invisible hole. Failurestainless fixings or not fitting according to Millboard’s guidelines may invalidate the Millboard 25 year warranty.
Two fixings per board should be used where the board crosses a joist. Millboard advise using three at the ends of the boards on shorter lengths. The fixings at the ends of the boards should be fixed at a slight angle to prevent being too close to the end of the board. 5 , positioning the screws 20–25mm from the ends and 30mm from the sides of the boards. Board ends should be supported by a minimum of 20mm. As the boards are dimensionally stable, they can be fitted with only 4mm spacing and 2mm gap at the ends of the boards. Millboards may have a +/- 2% dimensional variance. Best practice would be to fix the boards at one end, then a fixing in the middle adjusting spacing as necessary, then the far end. Then fix to the remaining joists. Working with a string line should give a neater result.
Cutting Millboard deckboards
Millboard can be cut with standard saw blades, although we recommend a carbon-tipped, multi-purpose chop saw. As the formed end of the Millboard is lost when cut, these can be placed in less visible areas against a wall or edging profile. A light sanding with sandpaper may be needed to clean the end. We stock a Millboard Touch-up Coating to match and blend in the exposed ends. Dispose of off-cuts as general waste, don’t burn them. When cutting the Millboard, wear a standard PPE dust mask, safety glasses, long sleeves and protective gloves. A dust bag must be used on chop saws. Make sure that the Millboard is adequately supported when cutting.
If the Millboard picks up marks during installation simply wash with hot, soapy water and a firm broom straightaway. To remove any cement and lime-based stains, we recommend using Geocel Brick & Mortar Cleaner. Test a small area first and follow the mixing instructions, leaving for five minutes before washing off with soapy water.
Millboard finishing touches
Millboard recommend that the purpose-made Millboard edging is fitted to all steps and perimeters of the deck. The straight and bulnose edging is coated with extra Lastane® for added resilience on these areas to help prevent excessive wear. It is important that the edging is supported on a joist by a minimum of 25mm. It is recommended to trim the ends to join tightly when fitting both edging and fascias. For the best visual effect, stagger the edging and fascia joints so that they’re not in line – this creates a subtler look.
Millboard also manufacture edgings and fascia in a flexible material, suitable for curved designs. Flexible Edging can be curved to follow a maximum convex diameter of 3 metres. These flexible profiles need to be at least room temperature (c.20ºC), then bent gently. Standard fascia will bend up to 3m convex diameter but use the ultra flexible for tighter curves. When fixing, start from the end and work along, fixing at 300mm intervals as you go. This material doesn’t conceal the fixings, leaving some fixing heads partially visible.
Durafix Trimhead Fixings are made from A2 Stainless Steel and are available in 50mm and 60mm lengths in boxes of 250. Both sizes are 4.5mm in width and include the appropriate sized Torx bit. Using the Millboard Durafix stainless screw means pre-drilling or counter sinking required. Once these screws are correctly fitted the Lastane® coating material on every Millboard flexes back over the fixing, leaving a virtually indistinguishable mark and creating a cleaner finish. Made from stainless steel, the screws have a self-cutting tip, six-point Torx head and are waxed for ease of use.


